Yes, you can improve plant growth with a few easy DIY garden projects. Raised beds, compost bins, mulch, drip watering, and cold frames help fix common problems like poor soil, dry roots, and short growing seasons. Each project is simple, useful, and built to make your garden work better. This guide shares 12 creative ideas that help plants grow stronger with less waste, less mess, and less guesswork.
Build Simple Raised Beds
If you want an easy way to start growing more food with less hassle, simple raised beds are a smart initial step. You get better drainage, warmer spring soil, and a tidy space that feels welcoming from day one. Even though your yard is rocky, sloped, or tiny, you can still join in and grow with confidence.
Start with a basic frame and add sturdy raised bed edging to hold shape and keep paths neat. Then build strong soil mix layers, so roots spread easily and plants stay healthy. Use richer soil on top, with looser material below for drainage.
Because the bed sits higher, you bend less while watering, weeding, and picking. That makes gardening feel easier, more social, and more like a shared rhythm you’ll want to keep each season.
Make a Compost Bin
Once your raised beds are in place, a compost bin becomes the next smart project because it turns kitchen scraps and yard waste into rich soil your garden will love. You can build one with simple compost bin materials like pallets, wire mesh, or a lidded plastic barrel. Choose compost bin placement that’s level, partly shaded, and close enough to your beds for easy trips.
| Material | Best Use | Benefit |
|---|---|---|
| Pallets | Open bin | Easy airflow |
| Wire mesh | Round bin | Low cost |
| Barrel | Small yards | Neat look |
As you shape your garden space, this project helps you feel more connected to the rhythm of growing. Add leaves, grass clippings, fruit peels, and coffee grounds. Turn the pile often, keep it slightly damp, and you’ll create garden gold together.
Start a Worm Compost System
You can make worm composting simple while you start with the right bin, because good airflow and moisture control help your worms thrive.
Then you’ll need to feed them the right scraps in the right amounts, so they stay active and don’t create smells or mess.
As the system matures, you can harvest rich worm castings and give your garden a natural lift.
Choosing The Right Bin
Because a worm bin becomes the whole world for your composting worms, choosing the right one makes the system easier to manage from day one. You’ll want enough room for bedding and airflow, so bin size matters. A shallow, wide bin often works better than a deep one because it gives worms more surface area.
| Feature | Why it helps |
|---|---|
| Bin size | Supports healthy movement and easy care |
| Material durability | Prevents cracks, leaks, and odors |
Next, consider where your bin will live. Should it stays indoors, choose a sturdy plastic tote with a lid and ventilation holes. Should it sits outside, pick a thicker container that handles weather well. You’re building a small, thriving habitat, and the right bin helps your composting setup feel simple, welcoming, and successful.
Feeding Worms Properly
Since your bin is set up and ready, feeding your worms the right way keeps them active, healthy, and busy turning scraps into rich compost. Start small, then add more food only once the last scraps mostly disappear. That simple habit helps you avoid odor, soggy bedding, and stressed worms.
To keep your worm community thriving, follow easy worm feeding schedules instead of dumping in everything at once. Bury chopped fruit and vegetable scraps in different spots, and mix in dry paper to support worm diet balance.
Skip meat, dairy, oily foods, and too much citrus, because those can upset the bin. Unless your worms seem slow, feed less for a few days and check moisture. You’re building a steady rhythm, and that rhythm helps your whole garden family feel capable, connected, and proud together.
Harvesting Finished Castings
A few simple signs tell you as soon as your worm castings are ready to harvest, and spotting them feels rewarding after weeks of steady care. The bedding looks dark, crumbly, and earthy, not like fresh scraps. That’s your cue to trust your harvest timing and get started.
- Stop feeding one side for a week, so worms migrate toward fresh food on the other side.
- Scoop out the finished side gently, keeping your worm community calm and together.
- Use castings sifting with a screen or gloved hands to separate worms, cocoons, and larger bits.
- Return any unfinished material to the bin, then store the finished castings slightly moist.
As you work, you’ll notice how this simple step connects you to the full compost cycle, and that shared rhythm feels deeply grounding.
Use Mulch to Hold Moisture
Mulch helps you keep soil damp longer, so your garden needs less frequent watering and your plants face less stress.
You can choose simple materials like straw, shredded leaves, bark, or grass clippings, depending on what you’re growing and the look you want.
For the best results, spread mulch about 2 to 3 inches deep, because too little won’t hold moisture well and too much can smother the soil.
Mulch Material Options
Several mulch materials can help you keep soil moist, and the best one depends on what you’re growing and how much care you want to give. If you want a garden that feels welcoming and easy to manage, choose a mulch that fits your plants and your style.
- Straw works well around vegetables and keeps beds looking soft and tidy.
- Shredded leaves make an affordable organic mulch and blend naturally into home gardens.
- Bark chips last longer and add a neat, decorative groundcover around shrubs and paths.
- Grass clippings suit busy gardeners because you can reuse what your yard already gives you.
As you shape your space, consider texture, appearance, and how often you want to refresh materials. That way, your garden feels cared for, connected, and truly yours all season.
Proper Mulch Depth
Because the right depth makes all the difference, spread mulch in a layer about 2 to 3 inches thick should you want to hold moisture without hurting your plants. That sweet spot gives your garden the care it deserves. It slows evaporation, keeps soil cooler, and helps roots stay steady through hot days.
At the same time, watch your mulch thickness near stems and trunks. Should mulch piles too high, it can trap moisture and invite rot, pests, or fungus. Leave a small gap around each plant so air can move freely. Then your mulch layering works with your plants, not against them. As you build your garden space, this simple habit helps everything feel healthier and easier to manage. You’re not guessing here. You’re gardening like someone who truly belongs in the dirt.
Set Up Drip Watering
Should you want healthier plants with less daily work, set up drip watering to bring slow, steady moisture right to the roots. You’ll save time, waste less water, and give your garden a reliable routine that helps everyone feel like they’ve got this.
- Map your lines so each bed, pot, or trellis gets coverage without soggy spots.
- Focus on emitters placement near each plant’s root zone, not the stems, so moisture goes where it’s needed most.
- Use filters and pressure regulators to keep flow even and prevent clogs before they frustrate you.
- Handle timer scheduling sooner, because a simple schedule keeps watering consistent while you’re at work, resting, or swapping tips with fellow gardeners.
With drip watering in place, you’ll nurture stronger growth and enjoy calmer mornings daily.
Add Ollas for Deep Watering
You can add ollas to your garden to water roots slowly and deeply right where plants need it most.
You bury these porous clay pots near your crops with the neck above soil, then fill them so water seeps out as the surrounding soil dries.
That simple setup can save water, cut down on frequent watering, and help your plants stay steady through hot, dry days.
How Ollas Work
How do ollas keep plants happy with less work from you? They use a simple clay vessel design to move water slowly into the soil right where roots need it. Because clay is porous, moisture seeps out only as nearby soil dries. That means you waste less water, and your plants stay steadier through heat.
Here’s why gardeners like you feel at home with this method:
- You follow porous irrigation basics without fancy tools.
- You give roots deep, even moisture instead of quick surface splashes.
- You help plants grow stronger because roots reach downward.
- You spend less time watering and more time enjoying your space.
As the soil pulls water from the vessel, your garden takes only what it needs. That quiet teamwork makes care feel easier and more connected.
Burial And Placement
For the best results, bury an olla so the rounded body sits below the soil line while the neck and opening stay just above the surface. That placement helps you keep the opening easy to reach and keeps your bed looking neat. In shared garden spaces or cozy backyards, it also makes your setup feel thoughtful and welcoming.
Next, place each olla where plant roots can truly benefit. Set it near the center of a cluster, matching root depth for the crops around it. In raised beds, check soil layering before you dig, so the pot rests firmly and doesn’t tilt. Leave enough space between ollas for root spread and easy planting. If you’re growing tomatoes, squash, or peppers, give the vessel room beside the main stem, not directly against it.
Water Savings Benefits
Once your olla sits at the right depth and spot, the biggest reward shows up in your water use. You give roots a steady drink underground, so less moisture disappears to sun and wind. That means fewer refills, less runoff, and healthier plants that feel right at home with your garden community.
- You water deeply, so roots grow down instead of staying weak near the surface.
- You can pair ollas with rainwater harvesting, which helps your garden family stretch every drop.
- You waste less water in drought tolerant beds, where slow release keeps soil evenly moist.
- You spend less time dragging hoses around, which makes gardening feel simpler and more joyful.
Because the water moves quietly below ground, you also cut weed growth, since the surface stays drier between fill-ups.
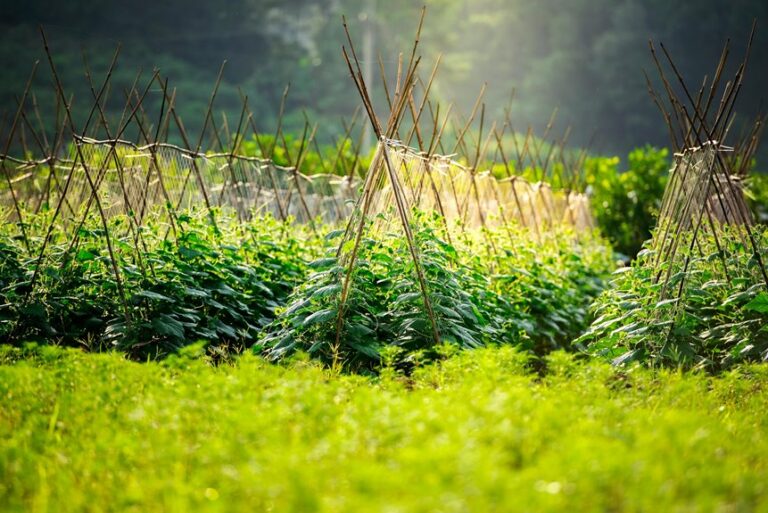
Build Trellises for Climbing Plants
If you want healthier climbing plants and a garden that feels taller and more alive, build a trellis that gives each vine a clear path upward. You create order, save space, and help your plants join the rest of the garden beautifully. Start with sturdy trellis materials like bamboo, wood lattice, cattle panels, or twine tied to a simple frame.
As your vines climb, they get better airflow and more sun, which supports steady growth and cleaner leaves. That makes your trellis a smart form of climbing crop support for peas, beans, cucumbers, and small tomatoes. You can place one against a fence, arch it over a path, or anchor it in a raised bed.
With a trellis, your garden feels welcoming, productive, and connected, like every plant finally has its place to belong.
Add Supports for Heavy Stems
Trellises guide vines upward, and stem supports step in as soon as fruit and flower heads start pulling plants down. As tomatoes, dahlias, or peonies start leaning, you can help them stay upright and healthy with simple stem staking and cane supports.
- Push supports in at an earlier stage, while roots and stems are still easy to work around.
- Tie stems loosely with soft cloth or garden tape, so plants can sway without snapping.
- Match the support to the plant’s weight. Use sturdy cane supports for blooms, and taller stakes for heavy vegetables.
- Check ties after rain and growth spurts, because stems thicken fast.
This small job helps your garden feel cared for, and you’ll feel more connected watching each plant stand tall with your support beside it.
Make Easy Garden Paths
Because a garden feels easier to enjoy whenever you can move through it without muddy shoes or crushed plants, simple paths are one of the smartest upgrades you can make. You create a welcoming space where everyone knows where to step, and that makes the whole garden feel more shared and cared for.
Start with choosing garden path materials that match your style and budget, like gravel, mulch, stepping stones, brick, or wood rounds.
Then consider path layout ideas that guide you naturally to beds, containers, or a favorite seat. Keep paths wide enough for a wheelbarrow or a friend beside you. As you build, level the ground and pack each layer well so the surface stays steady. A clear path helps you water, harvest, and linger longer, feeling right at home outdoors.
Install Borders to Block Weeds
While weeds seem small at initially, they spread fast and steal water, sunlight, and nutrients from the plants you worked hard to grow. That’s why adding border edging helps your garden stay neat, protected, and easier to manage.
You create a clear line that keeps grass and sneaky roots from creeping into your beds.
To make your space feel cared for and under control, try this:
- Choose stone, brick, metal, or wood for sturdy border edging.
- Dig a shallow trench so the border sits firmly and blocks spread.
- Add weed barriers under mulch to stop new growth before it starts.
- Check edges often and reset loose pieces after rain.
With strong borders in place, you give your plants a better chance, and your garden feels like it truly belongs to you.
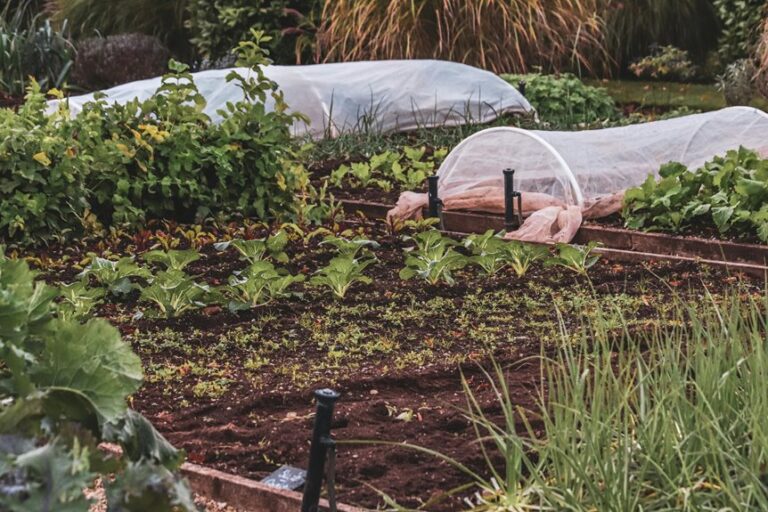
Build a Simple Cold Frame
Once your garden beds have clean borders, you can protect that tidy space even more via adding a simple cold frame. You don’t need fancy tools. Use scrap wood, an old window, or clear plastic over a basic box. Set it over young greens, herbs, or seedlings to create a warmer pocket of air.
That small shelter gives you reliable frost protection and helpful season extension while nights still bite. Place the frame where it gets strong sun, and tilt the lid slightly so rain runs off.
On mild days, lift the top for airflow, because your plants need fresh air as much as warmth. You’ll feel like part of the smart-gardener club while tender starts stay safe while others struggle. It’s a simple project, but it gives your whole garden a cared-for feeling.
Use Containers for Small Spaces
If your yard is tiny, or you only have a patio, balcony, or bare corner to work with, containers let you grow a real garden without needing a full plot of ground. You can turn overlooked spots into places that feel alive, welcoming, and truly yours.
- Choose deep pots for tomatoes, peppers, and dwarf beans.
- Build a balcony herb garden with basil, mint, thyme, and parsley.
- Try tiered containers to brighten corners and save floor space.
- Add hanging basket designs for trailing flowers, strawberries, or cherry tomatoes.
Because containers control soil and drainage, your plants often grow stronger and stay easier to manage. You can group pots by sunlight needs, move them with the seasons, and refresh empty areas fast. Even a small setup helps you feel connected, capable, and part of the gardening crowd.
Frequently Asked Questions
How Do I Attract More Pollinators to My Vegetable Garden?
Plant native flowers near your vegetables, set out a shallow dish of water with stones for landing spots, and avoid pesticides to bring in more bees, butterflies, and other pollinators. A garden that offers food, water, and shelter will support better pollination and a stronger harvest.
What Upcycled Materials Work Best for Decorative Garden Projects?
Old crates, pallets, retired furniture, wagon wheels, painted rocks, and bicycles all bring character to decorative garden projects. Turn reclaimed containers into planters, and use salvaged edging pieces to give the space a distinct, inviting look.
How Can I Design a Garden for a Rocky Yard?
Roughly 30% of yards have rocky soil, and you can still grow successfully by using raised beds, arranging a practical rock garden, improving drainage, and planting flowers that attract pollinators for a lively, productive yard.
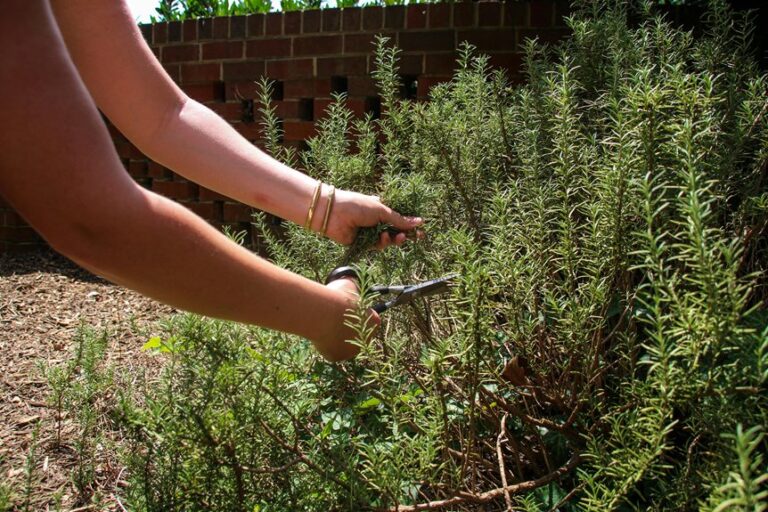
Which Plants Grow Well in Vertical Wall Planters?
Herbs such as basil, rosemary, thyme, and parsley thrive in vertical wall planters, along with trailing plants like pothos and ivy, strawberries, and compact flowers such as petunias or pansies. Herb pocket planters work well for fresh cooking ingredients, while succulent wall planters add texture and visual interest to small spaces.
How Do I Create a Shaded Seating Area in the Garden?
Create a shaded seating area by stretching a shade sail above the patio or setting a pergola over a bench corner. This adds shelter from strong sun, gives climbing plants a place to grow, and turns the garden into a comfortable spot for sitting with others.